Astrophotography with Intent: Planning, Framing, & Composition
It’s easy to chase shiny objects in astrophotography. But when I shoot with intent — when I stop and think about what I want from the image — the results are always better.
Intentional Target Selection
Everything starts here. Before I ever think about focal length, framing, or filters… I choose the target. That decision shapes every aspect of the imaging plan. And honestly — it’s not just about what’s high in the sky or seasonally visible. It’s about what speaks to me right now. Sometimes I’m craving a dusty wide-field composition. Other times, I want to explore what I can pull out of a dark nebula, or to go deep on a tight planetary nebula and see what details in narrowband I might be able to tease out of the object. Maybe I’m seeking a challenge — or maybe I’m circling back to a favorite target with new skills, new tools, or a different aesthetic in mind.
It’s part gut feeling, part technical strategy. And for me, that’s the magic. In all cases the object project needs to be fun and interesting. But it’s not just about the vibe — it’s also about intent. I rely heavily on my Imaging Archive to guide this process. Before committing to a new target, I’ll:
- Check what I’ve already captured (and how well I did)
- Identify gaps in my dataset (like a missing narrowband channel or an overlooked region)
- Plan re-imaging with improved gear or refined technique
This archive acts as both a creative prompt and a tactical guide. It is a collection of data and information about my works and it provides a resource to help me assess where I’ve been and potentially, where I need to go. It gives me information about my projects, such as the object, telescope, focal length, camera, binning, and exposure settings used that I can then leverage in order to make new decisions for working with my upcoming object project.
To help bring it all together, I use a suite of planning tools:
- NINA’s Sky Atlas and Framing Assistant for real-time planning and mosaic layout
- Stellarium for framing and planning with my custom landscapes and oculars
- Telescopius for target ideas, visibility windows, and framing simulations
- Astronomy Tools FOV Calculator for matching sensor + scope combinations
- Target Scheduler Plugin (in NINA) to pre-plan sequences for dark sky trips
These aren’t just utilities — they’re how I connect inspiration to execution. They allow me to create combinations of telescopes with reducer, for specific cameras and get a preview into what possible framing and fields of view I can work with. They help me assess target availability, altitude, location in the sky, and give me the information I need to critically assess how I want to approach a target object.
Another critical factor in target selection is where I’ll be imaging. When I’m planning a trip — whether it’s to a darker site or somewhere with a significantly different latitude than my usual 40° — my typical targets might no longer make sense. Some objects that skim the southern horizon at home may rise high and clear elsewhere. Conversely, targets I can easily capture from home might be completely obstructed or less optimal due to altitude or transit time. That’s where these planning tools become indispensable. I can forward-simulate visibility windows, altitude tracks, and optimal framing for a specific date, time, and location — all before I ever pack a telescope. Especially for multi-night trips under dark skies, this lets me build a realistic, efficient imaging plan that maximizes conditions and minimizes wasted time.
Gear Selection Comes After Target Choice
The target determines the gear it needs to reveal its secrets — not the other way around.”
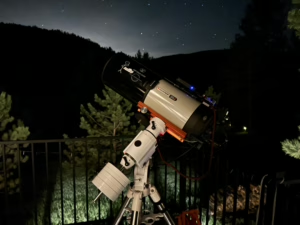
Once I’ve decided on the object, I figure out which system fits best: native, reduced, or wide-field. This is where the versatility of the EdgeHD 8 really shines. It’s not just a single-purpose instrument — it’s a modular platform that can transform to match the needs of the project.
At its native 2032mm focal length (f/10), the EdgeHD excels at high-resolution detail. This is ideal for small galaxies, planetary nebulae, or compact HII regions where I want to really dive in and resolve structure. It’s demanding in terms of tracking and seeing conditions, and not particularly fast — so I typically only shoot native when I have enough time to accumulate long integration and I’m confident in my skies and guiding.
With the 0.7x reducer in place, the scope drops down to 1422mm (f/7), which provides a nice balance between field of view, resolution, and speed. I use this configuration most often when I’m chasing medium-sized targets — objects that still benefit from tighter framing, but where the native focal length would be too restrictive. It’s also more forgiving when I have shorter windows of darkness or marginal conditions, and I can still achieve great signal quality.
And then there’s HyperAF. This configuration is a complete shift — a wide-field, f/1.9 optical train that replaces the secondary mirror entirely. It transforms the EdgeHD into a light cannon, reducing focal length down to ~388mm and massively increasing photon throughput. HyperAF is my go-to when time is limited, weather is uncertain, or I’m trying to rapidly build a dataset. It lets me approach targets that would normally take a week in just a single night, and opens up a lot of creative freedom when it comes to wide compositions and fast, deep imaging.
Separate from focal length or system choice is the question of OSC (One-Shot Color) or Mono. This decision depends on what I’m trying to achieve and how much time I can invest. OSC is fast and efficient — a great fit for broadband targets or quick trips where I want to keep setup streamlined. But for narrowband, maximum control, and higher resolution, mono is the clear winner. It allows me to use specialized filters (like Ha, OIII, SII, or RGB with custom ratios) and extract more from the data, especially under light-polluted skies. I’ve shot entire sessions with both — sometimes even in parallel using different setups — but the choice always comes down to what the project needs.
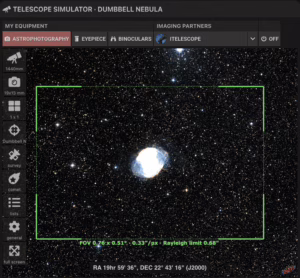
Planning the Frame: Tools, Rotation, and Composition

This is where the fun begins! With the target and gear chosen, it’s time to frame the shot — and this is where the storytelling begins. I rely heavily on NINA’s Framing Assistant, Telescopius, and Stellarium to explore different focal lengths, orientations, and multi-panel mosaic layouts. These tools help me visualize how a target will sit in the frame and how I can enhance the composition beyond just putting the object in the center.
In Stellarium, I’ve configured both my main camera and guide camera fields of view. This allows me to preview not only the main framing, but also to confirm guide star availability — especially important when planning off-grid or automated sessions. I can even explore different guide scope rotations to ensure I have stable tracking no matter how the main camera is rotated.
As I build the frame, I look for companion objects or interesting features I might want to include — small background galaxies, tight star clusters, or distant arcs that could add depth to the scene. It’s a creative process, but also a strategic one. I’ll often rotate the camera manually, or digitally within the planning tools, to align dust lanes diagonally or give a nebula a sense of upward flow.
Framing isn’t just a technical step — it’s the beginning of visual storytelling. It determines how the viewer’s eye moves through the image and how the target feels. Sometimes the right rotation can turn a static image into one with energy and flow.
The way you frame a target can completely change how it’s experienced.
Planning for Processing
Even at this stage, I’m thinking about the final image. The filters I choose, the exposure strategy, the amount of integration time — it’s all shaped by the aesthetic and technical goals I have for the finished piece.
If I’m working on a narrowband target, I ask myself: Will this be HOO, or do I want to lean into a classic SHO Hubble palette? If it’s broadband, am I aiming for natural star color with minimal gradients, or a deeper stretch to expose faint IFN? The way I shoot is guided by how I plan to process — and that processing strategy is informed by what I want the final image to feel like.
I don’t treat PixInsight and Siril as either-or options. Sometimes I process a full workflow in PixInsight. Other times, I stack and calibrate in Siril, then bring the data into PixInsight for noise reduction, stretching, and fine control. Often, it comes down to the path of least resistance: What will get me closest to my vision with the least friction? I don’t force a fixed routine — I adapt it based on the needs of the data and the project.
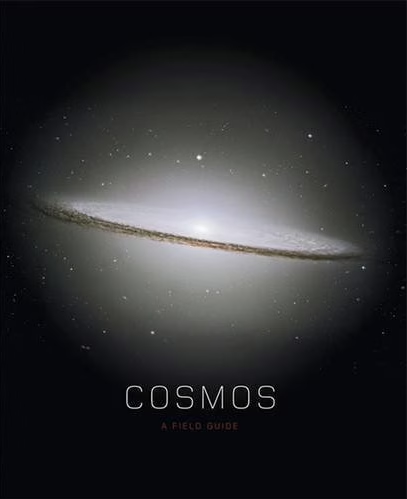
This is also where I pull inspiration. I keep a running list of reference images: NASA Hubble releases, AstroBin galleries, even Wikipedia entries with curated astrophotography examples. I look at how others have composed, stretched, and interpreted the same object — not to copy, but to see what’s possible. It’s part of how I set goals for my own work.
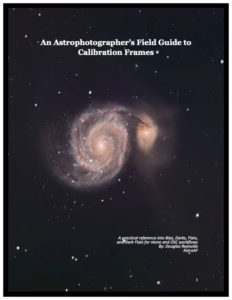
One of the most influential references for me right now is Cosmos: A Field Guide. The cover image of the Sombrero Galaxy — framed with such precision, space, and elegance — captures exactly the kind of aesthetic I aim for. My current imaging project on M104 is directly inspired by it. That image isn’t just a reference… it’s a benchmark. It informs everything from how I center the object to how I stretch and crop during processing.
Inspiration is part of the process. I don’t shoot and then decide what to do. I shoot with intent — and I let that intent guide every decision from planning to post-processing.
Fun, Feeling, and the ‘Why’
Let’s not forget — this is supposed to be fun.
Sometimes, I choose a target simply because it looks cool. Other times, it’s because I want a challenge, or because I’ve never seen anyone capture it in a particular style. Maybe the composition speaks to me, or maybe the science behind the object catches my interest that day. Not every session needs to be optimized or maximized — sometimes, it’s just about doing what feels right.
Intent doesn’t mean rigidity. It doesn’t mean being clinical or over-strategizing every decision. It means being aware of why I’m pointing my scope at this patch of sky — tonight, under these conditions, with this configuration — and making the most of it.
For me, it always comes back to this:
The target determines the gear it needs to reveal its secrets
If you’ve enjoyed this deep dive into how I plan, frame, and shoot with intent — there’s more where that came from.
🪐 Subscribe to this blog for future posts
🎥 Join me on YouTube for behind-the-scenes and walkthroughs
☕ Support the mission on Buy Me a Coffee to help support AstroAF content
Let’s explore the sky — with intent, and with purpose.
See you out there!
Cheers!
Doug
Leave a Reply