Astrophotographers continually seek ways to streamline their imaging sessions. Integrating NINA’s Advanced API with Home Assistant offers a powerful method to monitor and control your equipment seamlessly. In this guide, we’ll walk through the process, enabling you to enhance your astrophotography workflow.
Introduction
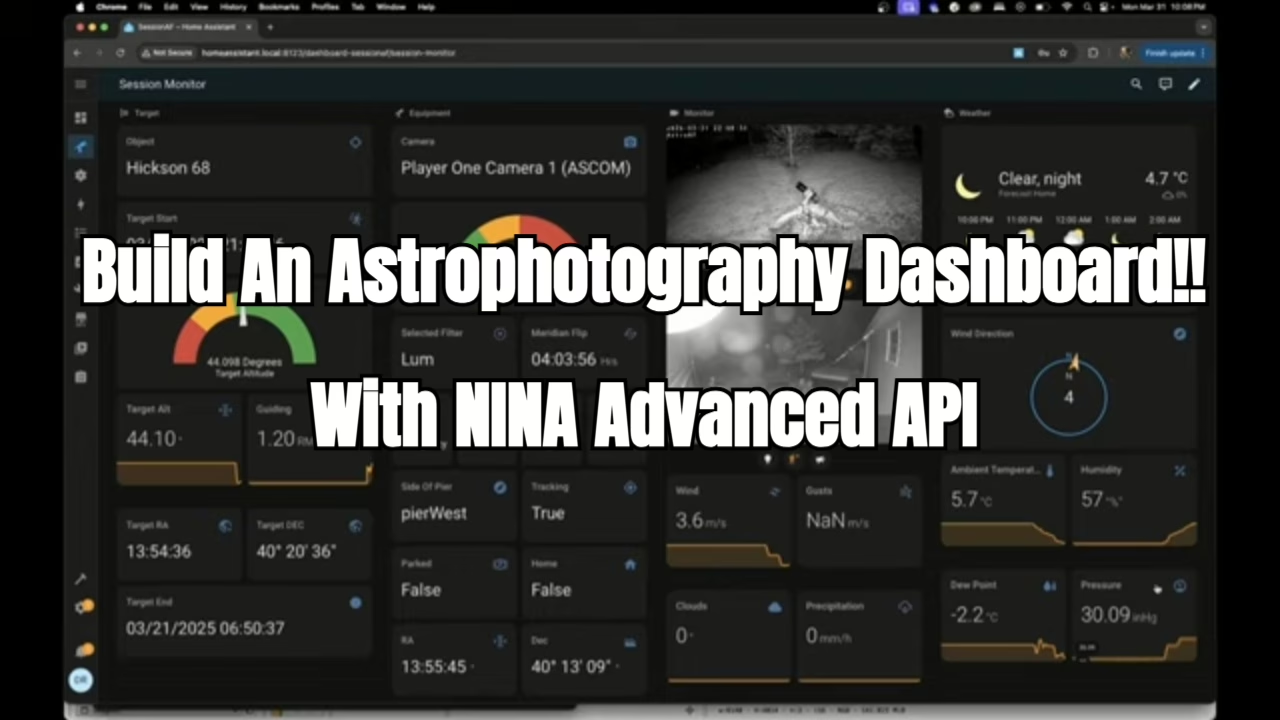
In my recent video, I demonstrated how to integrate NINA’s Advanced API with Home Assistant to create a dynamic dashboard for monitoring astrophotography sessions. This integration allows real-time access to equipment data, providing a centralized platform for efficient session management.
Prerequisites
Before diving into the integration, ensure you have the following:
- NINA (Nighttime Imaging ‘N’ Astronomy): An open-source astrophotography suite.
- Home Assistant: A platform for smart home automation.
- NINA’s Advanced API Plugin: Enables API access for NINA (Add From NINA Plugins Tab).
- Postman: A tool for testing API requests.
Setting Up NINA’s Advanced API
- Install the Advanced API Plugin:
- Open NINA and navigate to the Plugins section.
- Search for “Advanced API” and install it.
- After installation, restart NINA to activate the plugin.
- Configure the Plugin:
- Go to the Plugin settings
- Note the Network Addresses provided; these will be used for API requests.
Testing the API with Postman
To ensure the API is functioning correctly:
- Open Postman.
- Create a New GET Request:
- Use the endpoint
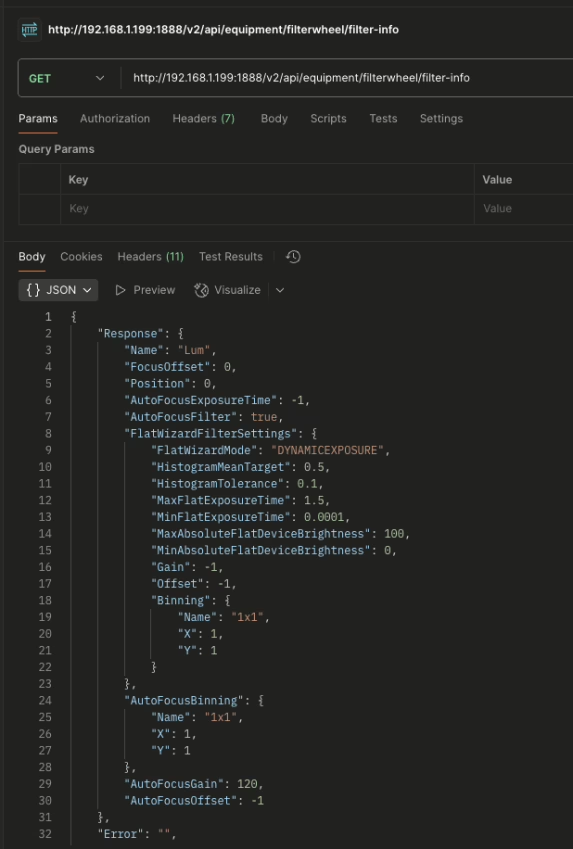
/equipment/filterwheel/infoappended to your NINA base URL. For example:http://[base_url]/v2/api/equipment/filterwheel/info.
- Use the endpoint
- Send the Request:
- If configured correctly, Postman will return a JSON response with details about your filter wheel.
Integrating with Home Assistant
- In Home Assistant, add the following to your
configuration.yaml- This sensor fetches the current filter name from NINA and updates every 60 seconds.
- Restart Home Assistant:
- After adding the sensor, restart Home Assistant to apply the changes.
sensor:
  - platform: rest
    name: "Selected Filter"
    resource: "http://192.168.1.199:1888/v2/api/equipment/filterwheel/filter-info"
    method: GET
    value_template: "{{ value_json.Response.Name }}"
    scan_interval: 60
Building the Dashboard
With the sensor in place:
- Navigate to Your Dashboard:
- In Home Assistant, create a new dashboard or go to the desired dashboard.
- Add an Entity Card:
- Edit the dashboard and add a new card.
- Choose the “Entities” card.
- Select the “Selected Filter” sensor.
- Customize the Card:
- Rename the entity to “Current Filter” or as desired.
- Save the changes.

Conclusion
Integrating NINA’s Advanced API with Home Assistant provides a robust solution for monitoring your astrophotography sessions. By following the steps outlined above, you can create a customized dashboard that displays real-time data from your equipment, enhancing both convenience and efficiency.
For a detailed walkthrough, refer to the embedded video above. If you have questions or need further assistance, feel free to reach out in the comments or join our community on Discord! Join my Discord Server
Leave a Reply