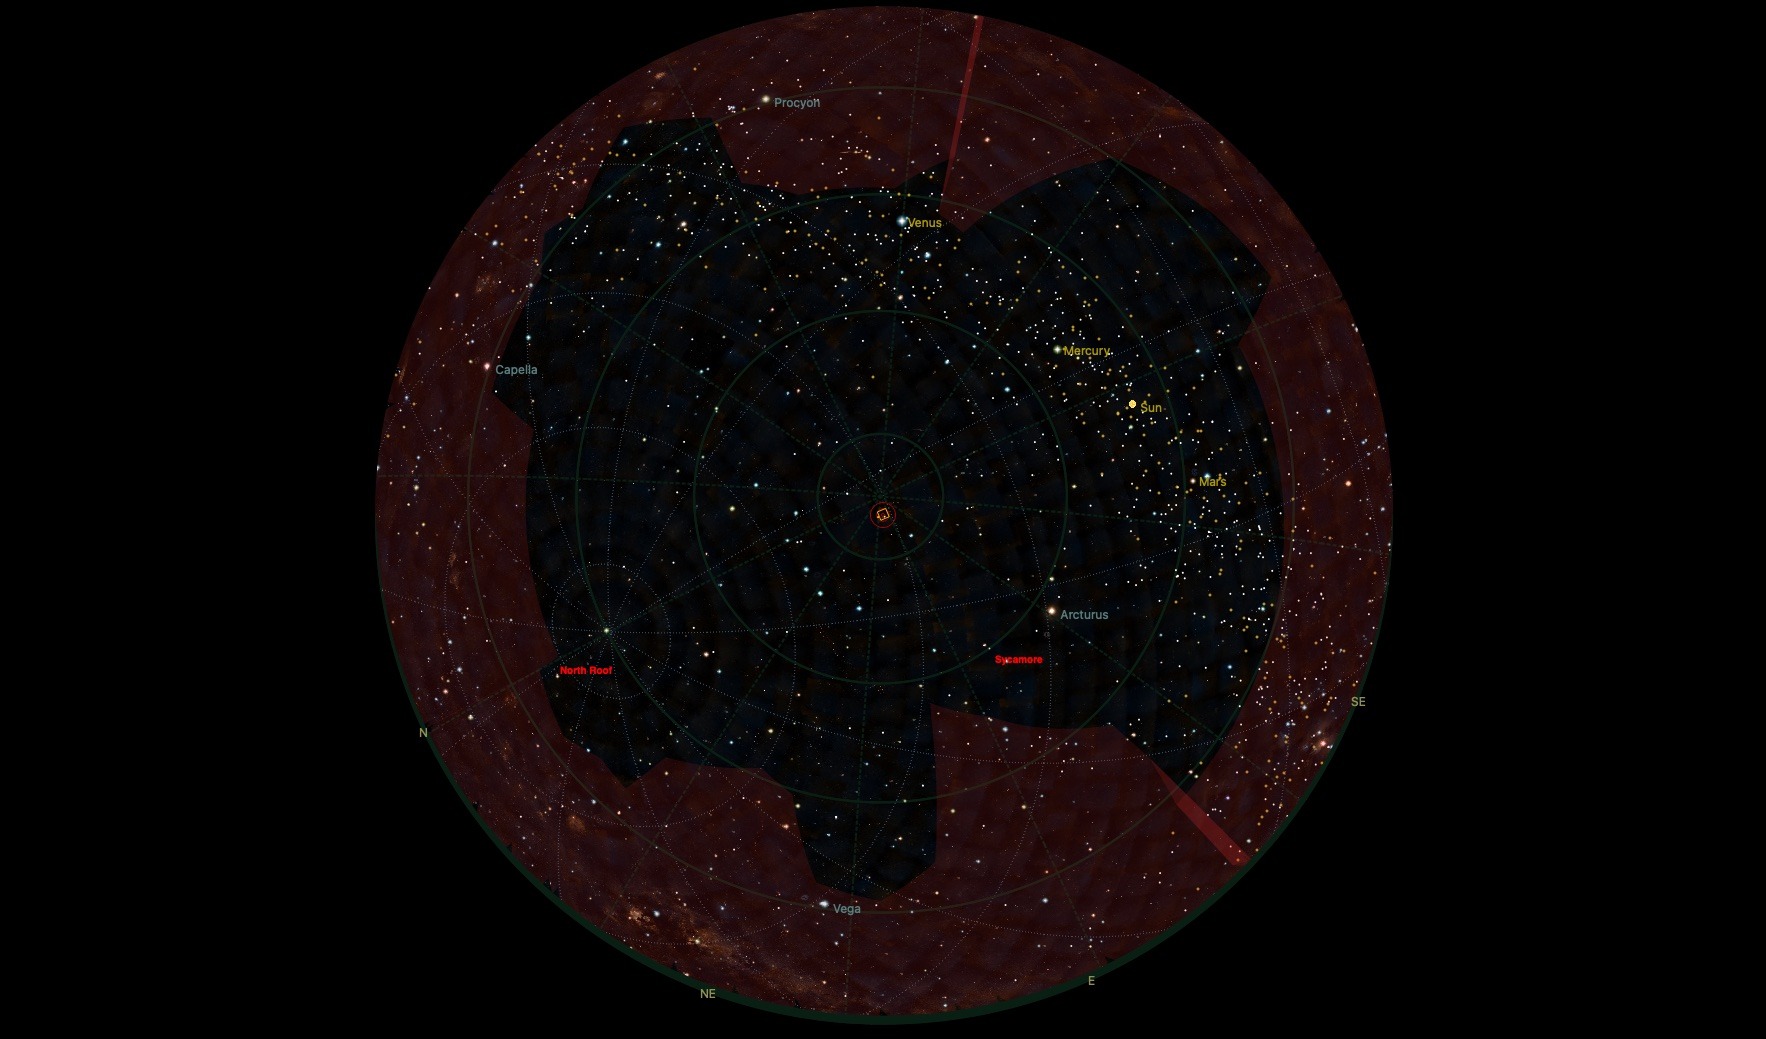
Let’s set up a custom terrain in KStars and create an artificial horizon in KStars on Mac!
Setting this up will give us better idea of our actual sky view with obstructions . I will walk you through the process and hopefully you will find this helpful, let me know if you have any questions down in the comments. We will skim over some things, such as actually getting the 360 view around the telescope I’ll just discuss briefly the one that I made; it was simple.
I hope you enjoy this article and I really appreciate you stopping by AstroAF!
Load A Custom Terrain Image
In Kstars, the first thing that we want to do is load the custom terrain image you would have already created. From within Configure KStars (CMD+Shift+,), select the show terrain checkbox and then navigate to the 360 PNG image that you created of your terrain\ background. Then, click Apply and then OK.

You should now see your custom terrain image on the Sky Map. You can scroll around and view your obstructions, such as trees, buildings, and anything else that may be within your field of view.
With the 360 image we are just trying to get close. What is important is that the terrain image is aligned to the NCP as well as finding the correct altitude offset.
Re-open Kstars configuration and notice the Terrain Image Azimuth Correction Degrees field. Find the North point on your image and align it to NCP by changing the value in this field. You can make a change and click apply to see the change in your azimuth correction. Once you have your image aligned with NCP you are ready to work on the Terrain Image Altitude Correction.
How To Calibrate Terrain Image
The question that I had on this step was how do I know if my terrain image altitude is correct or not? What I ended up doing is creating some points on the map by dropping flags. I just did a couple because it really does not need to be exact, just close. This can always be re-aligned at any point by returning to the terrain configuration. What I ended up doing was to slew my scope while looping images of the top of my roof, locating the North position so I knew that that was where that altitude line was aligned. This is basically right in the area that I know is true North in my image.
Make sure to give your marker flag a little room, this is so the obstruction line is actually below the marker flag. I then found the highest point in my terrain image and set a point flag right above using the same process of looping images and slewing my scope until I found the top of the obstruction.
Artificial Horizon
Next, there is an option in the settings menu for Artificial Horizon (Settings -> Artificial Horizon) . In this step you will plot a series of points around the Sky Map that are positioned just outside of the obstruction line. When placing the last point, make sure and reconnect the plot point to the first one so as to create a solid boundary all of the way around the Sky Map. Notice that you created this plot as a region, your custom horizon is saved in a sqlite database in the KStars Application Support directory found In your Library directory.

Now, with all of your points plotted around the Sky Map, click on apply and close, then, a red outline indicating your obstructions will appear on your Sky Map. This outline is your boundary area and at this point you can turn off the custom background in Configure KStars dialog. Your new Sky Map view of the sky has all of your obstructions, now showing you the un-obstructed sky areas.
Schedule Constraint
Go into Ekos Scheduler and select Artificial Horizon. This now becomes a constraint for your sequence scheduling which will ensure that your schedule will not start until no obstructions are in the way of your target. The scheduler will automatically update the job start time based on the obstruction constraint for the Artificial Horizon. When you create a a new sequence schedule it will ensure that target objects are not behind any obstructions that are defined within the custom horizon. That’s pretty cool!!

If you have any questions about getting this setup, certainly let me know in the comments. Getting setup is pretty simple and can be done quickly. The idea is to map out your real physical obstructions so that you have an actual Sky Map view for your location. You can create multiple regions, meaning that if you are shooting from more than one location, you can setup a custom region for each location. If you have a 360 camera, it is doable in 30 to 40 minutes and you might spend another 10 to 15 minutes setting up your custom horizon.
I hope this setup guide for custom terrain in KStars and create an artificial horizon In KStars on Mac proves useful for you, in your backyard or while on an astro trip to a dark sky site! No matter the location, you will be ale to know where your obstructions are and automate your Ekos scheduler using the custom horizon you created. Thank you so much for stopping by! If you like this article please consider sharing and I invite you to subscribe over on my Youtube Channel.
Find me on the social link buttons down below! Check out my Astrophotography Portfolio!


Leave a Reply